Showing posts with label DIY. Show all posts

Friday, January 15, 2016

SC Flood and DIY Dryer Balls with Essential Oils

Our great state of South Carolina experienced a thousand year flood in October. Of course meteorologists predicted that there would be a lot of rain. But who really ever puts much stock in that?!......Welllll, let's just say their predictions were correct this time.

We live about 30 minutes outside of Columbia, and we never thought we would be affected by flooding.

My husband woke me up around 8:15 on that Sunday morning saying, "Babe you won't believe this rain. Come look!" This guy was sooo excited! We had never seen anything like this before!

 These pictures of our backyard were taken at 8:30 am. Like a child on Christmas Day!


This was a one-hour difference. These were taken at 9:30 am:


And that's when it started to get real. It continued to pour and pour and pour some more. Needless to say, his excitement was no more. I kept asking him, "What's our plan? What are we going to do?"   
We thought we could do something to prevent it from coming in the house. HA!! Yeah...right!

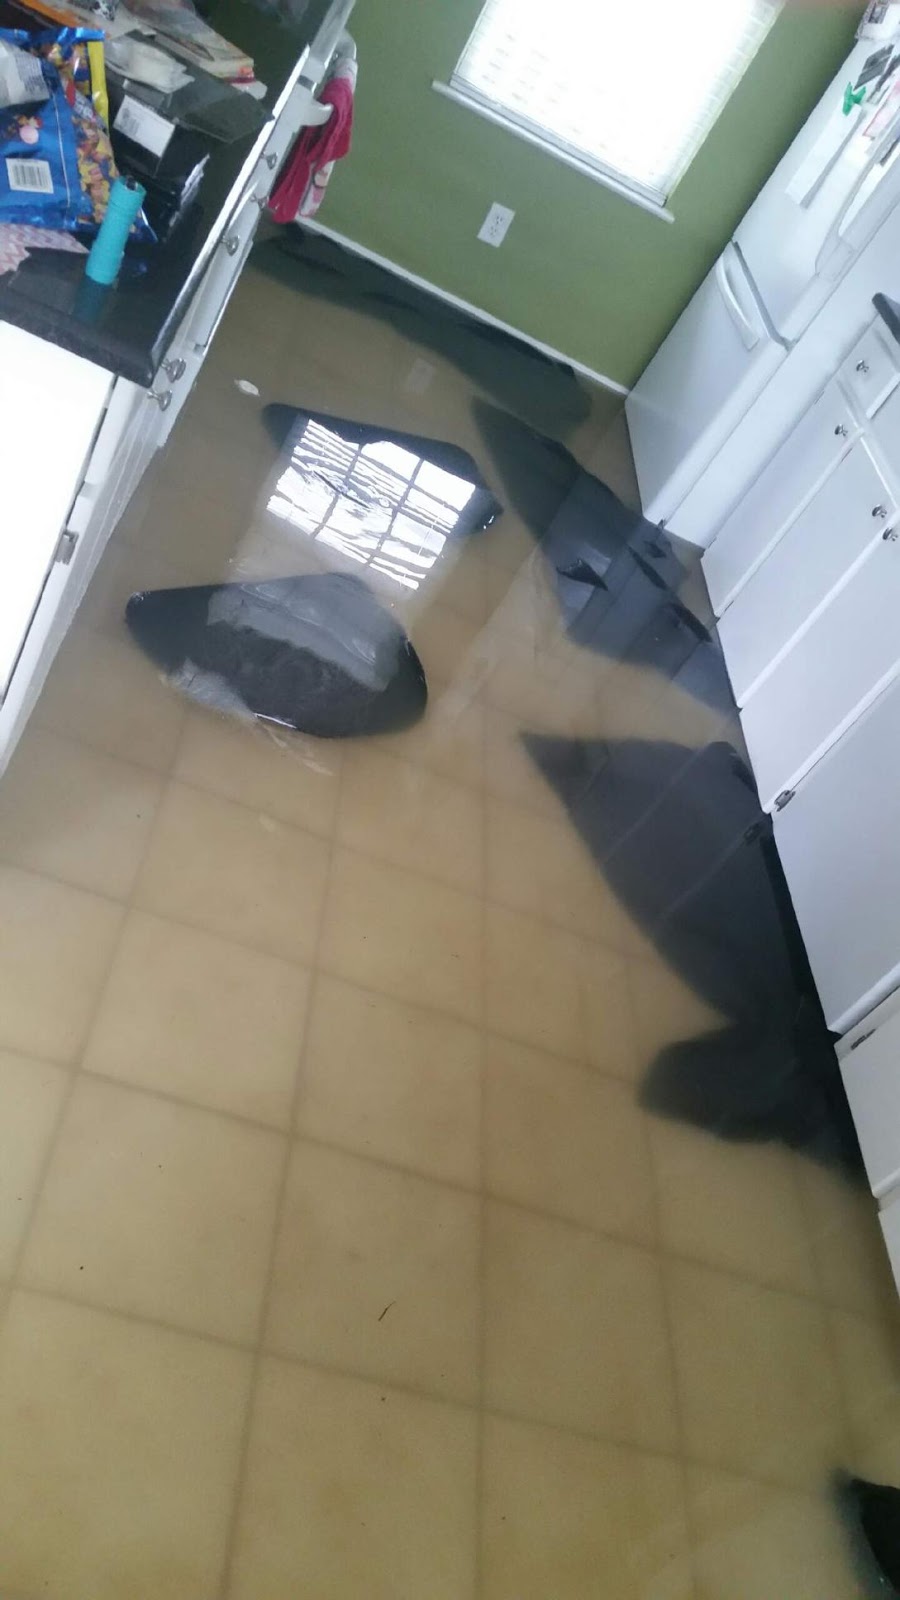
These were the last pictures we took before grabbing some things and leaving to go stay at my parents' house. We threw out every towel we had in the entire house. I know. Good one. Like that would really help. 

These are our rugs and towels floating around. 
 
We had everything back in place, and our home was back to normal right before Christmas. With the mold and mildew, and dust from sanding the new walls, we knew we would have to wash every piece of laundry in the house. I had been wanting to make dryer balls with Essential Oils for a little bit at that point and had even already purchased the yarn to do so. Knowing how much laundry we would have to do, I decided it was the perfect time to make the dryer balls. I followed the instruction here to make them. She has lots of great ideas on using Essential Oils!


I threw out my dryer sheets and have forever replaced them with dryer balls! These dryer balls have significantly decreased our drying time which is what I really love about them! Less drying time = lower energy bill! These balls will also last years. So, there's one less thing I have to buy at the grocery store. #win #ihategroceryshopping

Here's more on the benefits of using dryer balls! 

 I made a ball with the yarn, stuffed them and tied them off in old panty hose, and washed and dried them a few times to ensure felting. Then they were ready to go! Make sure you use 100% wool. Go to the Overthrow Martha blog link above to see pictures of the process. I followed those pictures step-by-step. I use Geranium, Lavender, and Joy on mine. I have also used Citrus Fresh a few times. I put about 3 drops on each ball. After drying a few loads, you will want to reapply some oils if you want a light scent. What's neat is that you can change things up each time. Use Lavender on a few loads, then Joy on a few, or none if you don't want a scent (like when washing your husbands' hunting clothes...smh). I use all 5 balls in my dryer, but you don't have to. Some people only use two or three. Our dryer takes forrreevveerr, so that's why I use all of mine each time. 

Click here if you want to purchase your own Premium Starter Kit which includes 11 oils, a Diffuser, and samples of other goodies. This is the best deal if you are wanting to get started with Young Living Essential Oils (only the best oils in the history of ever...duh!).

Wednesday, January 13, 2016

DIY Lip Balm using Essential Oils

Two years ago, one of my students' parents gave me some homemade gifts as Christmas presents - one of which was lip balm with essential oils. At the time, I had no idea what essential oils were, but I DID know that that lip balm was dabomb.com.

Fast forward two years. I got in touch with that parent, and she sent me the recipe she uses.

I made my first batch of lip balm with Young Living's Essential Oils over Christmas break. The recipe I used made about 24 tubes. To make yours you will need lip balm tubes (ordered from amazon), beeswax, coconut oil, vitamin E oil, pipettes (ordered from amazon), and essential oils of your choice. I used the same oils that the parent used in the one she gave me - 5 drops each of Rosemary, Peppermint, and Lavender.

The recipe is here!


Add some glitter tape, washi tape, or a cute ribbon, and you're done! Or leave some plain so the man in your life can enjoy. That's what I think is great about it - the smell, taste, and look of this chap stick is very neutral...there's no red color, strawberry/cherry taste to it.


Let me know if you're interested in ordering the best essential oils. Young Living offers the opportunity for customers to get 24% off all orders, simply by becoming a wholesale customer. There's no monthly fee or minimum, no obligations. By becoming a wholesale customer, you're also eligible for exclusive specials and promotions every month. 

As a wholesale customer you're also able to buy Starter Kits which is how most people (including myself) get started with essential oils. The Premium Starter Kit will give you the most bang for your buck. Here's the link if you would like to order your kit! My member number is automatically filled in so I'll know when you order and can help you get started or answer any questions you may have!

Saturday, January 9, 2016

DIY Dry Skin Sugar Scrub with Essential Oils

I made a sugar scrub with essential oils to give as gifts to some friends and family. I read through several different recipes and decided to go with this one. It calls for 1 cup of sugar, 1/2 cup of organic coconut oil, and essential oils of your choice.

I decided to use Lavender and Eucalyptus. I used Lavender because..well, because it's Lavender! Who doesn't love Lavender?! It's relaxing, calming, and helps dry skin. I used Eucalyptus Globulus because it's refreshing and is good for sore muscles.


Here's all the ingredients needed for this sugar scrub:


I found the cute red glass jars at Target - they came as a 3-pack.  The recipe was enough to fill the 3 jars plus a little left over for me! This took no time to make. I used the sugar scrub on my feet, but it can be used anywhere that's dry. Just scrub it on your skin, let it sit for a little bit, then rinse off. Soft skin for days! I will definitely be making more in the Spring when it's flip-flop-wearing time. Wait..what am I talking about?! It's South Carolina. Flip-Flop season is year-round!  After all - it was 80 degrees here on Christmas!!

Let me know if you're interested in getting started with Essential Oils! I'm so glad I did!

The BEST Face Wash..and it's DIY!

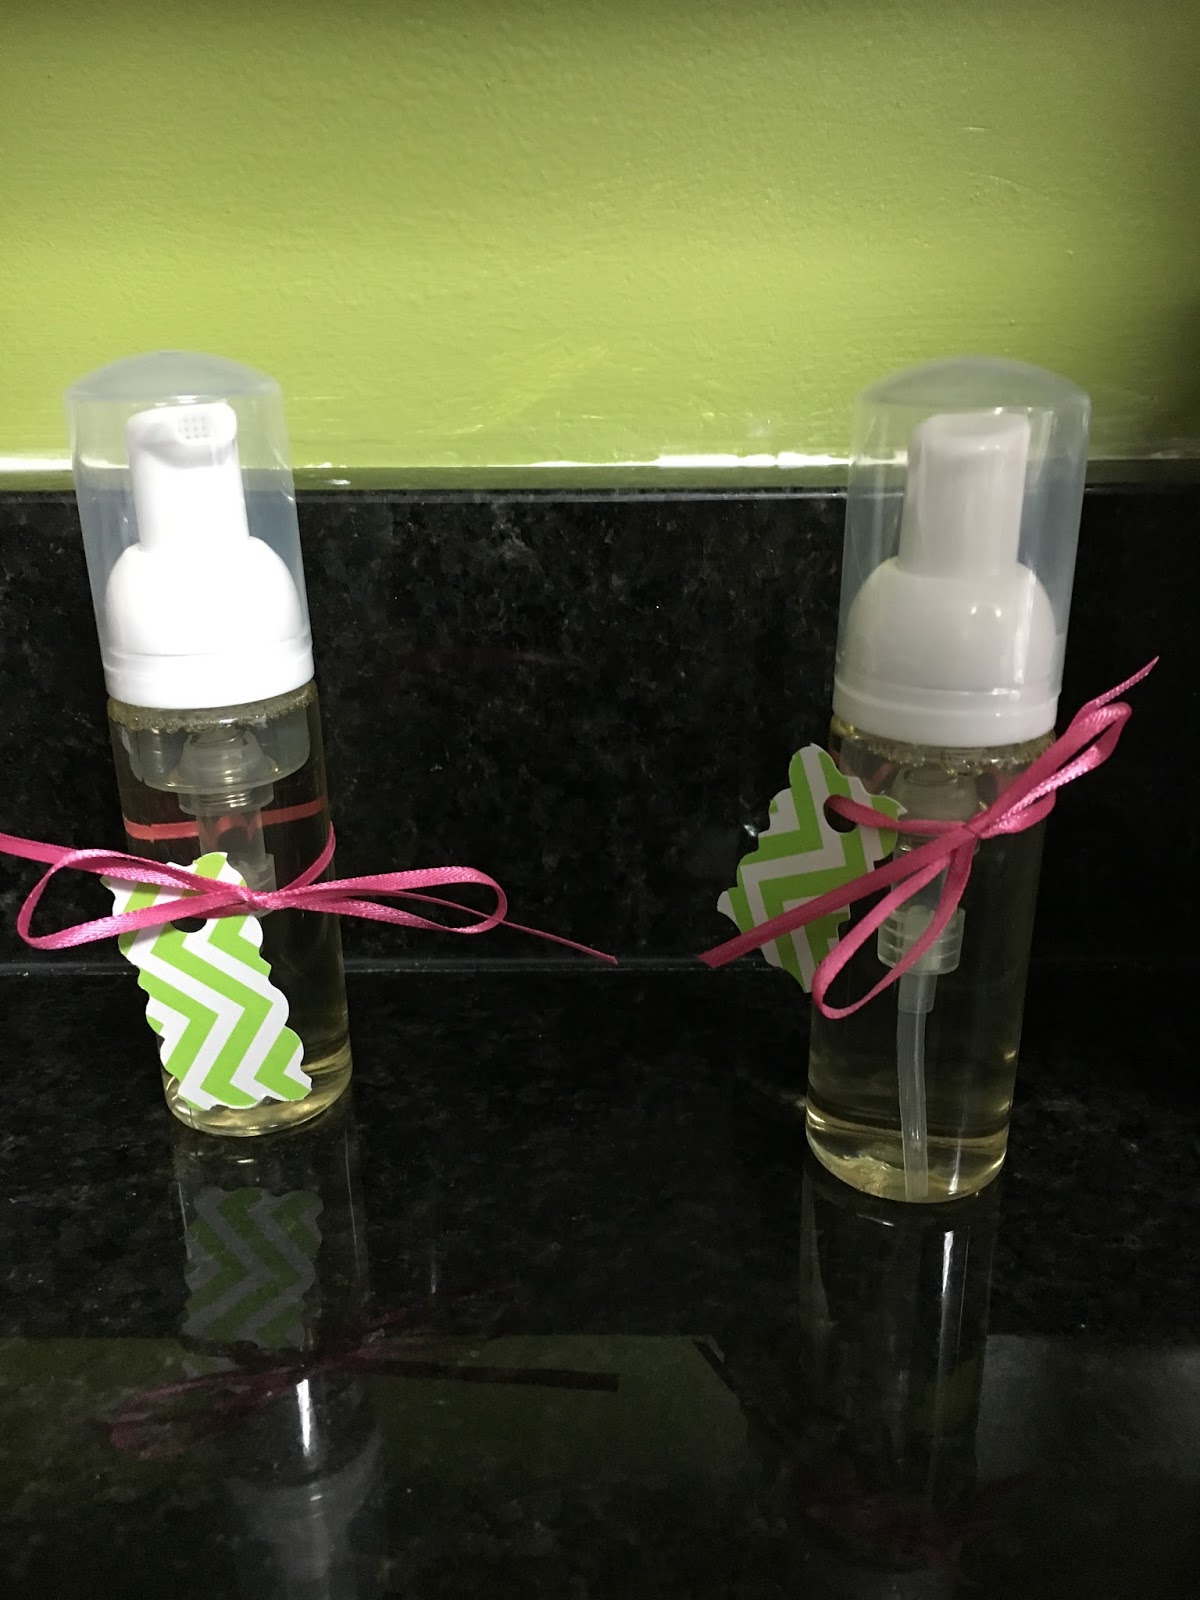
My husband asked me to make travel-sized face wash for him to take on trips. Yes, this face soap is that good! I made some yesterday for the two of us and to give to some family and friends. I followed the same recipe I used before, but I added Geranium this time to a couple of bottles to see how I liked it.


You can find info on the first batch of face soap I made for my husband and I here. We started using it at the end of July, and we are just now finishing it up, so I will be making more soon in a regular sized bottle. Our skin has never looked or felt so good. We love it and have often said we won't be buying store-bought face wash again.

I did not have Geranium the last time I made it. Click on the image below to read about some of the  benefits and uses of Geranium.


I filled about 1/3 of the bottles with Pure Castile Soap in Lavender. I then added 3-4 drops of oils (2 Tea Tree, 1 Frankincense, and 1 Geranium) and filled the rest of the way with distilled water. That's it! 


Disclaimer: This information is not meant to diagnose, treat, cure, or prevent any disease. The information represents what I, an Independent Distributor of Young Living Essential Oils, have chosen to do to change my lifestyle and personal health. Statements on this website have not been evaluated by the Food and Drug Administration.

Thursday, July 30, 2015

DIY Face Soap Using Essential Oils

Today I made my own face soap using some of my Young Living Essential Oils. I love that I am living a healthier life with essential oils by replacing products that contain harsh chemicals with ones that contain all natural ingredients. I love knowing exactly what's going in my body and what's in my household.


What I REALLY love about this is that it's simple. If I read about anything DIY, domestic(ish) online that I would like to try but has 10,000 ingredients and/or steps, I'm out. That's a wrap. Close the tab. Next.     This has 3 ingredients and 3 steps. It's liz-friendly. I approve!


Here's what I used:

  • Pure Castile Soap (I get mine at Target)
  • Foaming Soap Dispenser (I reused one from Bath and Body Works)
  • Distilled Water
  • Young Living's Frankincense
  • Young Living's Tea Tree 


1.) Fill container about 1/3 way full with the Pure Castile Soap.

2.) Add Essential Oils. I put about 8 drops of Tea Tree and 6 drops of Frankincense. Tea Tree is supposed to help fight acne and is a cleanser that is actually in many skin care products. Frankincense also supports your skin health by reducing the appearance of wrinkles, sunspots, scars, etc.

3.) Fill the rest with distilled water.
Shake before each use to ensure the oils are dispersed throughout the bottle.

Easy Peasy Lemon Squeezy!

My husband used it before I did tonight. I asked him how he thought it was. The only response I got out of him was that it smelled weird.
Typical.

I love that I am taking steps towards having less toxins in our home!! Please let me know if you have any suggestions or other ways that you're using your oils!

Disclaimer: This information is not meant to diagnose, treat, cure, or prevent any disease.  The information represents what I, an Independent Distributor of Young Living Essential Oils, have chosen to do to take charge of my own personal health.  Statements on this website have not been evaluated by the Food and Drug Administration. 

On another note...how about the season finale of The Bachelorette from Monday?!? AHHHHH!! So excited that Shawn got the final rose!

And why am I up writing a blog post at 2:35 am?! Well, duh, it's summer. And I'm a teacher, so I can! 
#sorrynotsorry
#enjoyingitwhileican

Sunday, June 21, 2015

Initial Reaction to DIY Essential Oil Products

I posted here about making make-up remover cloths and face cream using some essential oils from my Young Living Premium Starter Kit. I'm not going to be that girl that's super dramatical (thanks for the word, Flava Flav) and rave about how amazingly fantastic and life-changing these products are after only using them for two or three days. I'm not going to do a full review until after I've used them for a few weeks, but I do want to give you my initial reaction.

The makeup remover cloths were too wet. Next time I will have to adjust the amount of liquids I use and/or the amount of cloths. They were also too soapy at first, so I added in a little more water. What I've started doing is getting a dry cotton round and lightly pushing it in with the others so that it is damp. This has worked great. I typically don't wear a ton of makeup - except for mascara. Now that, I pile on. I have noticed that I do not have to rub my eyes near as long when taking off my mascara as I did when using the store bought ones. I was afraid that the oils would cause my face to sting, but they have not.

As for the cream, the texture of mine is perfect. However my mom's has stayed in a liquid state. She tried putting it in the refrigerator, but then it was completely hardened so she wasn't able to use it. We are working on this and will hopefully have something figured out soon. Any suggestions?!? The label on the coconut oil says that it turns from solid to liquid at 75 degrees, but there's no way her house is 75 degrees...and both of our creams were made at the same time..?

On another note, we've had a busy couple of days. We went from a family of 5 (mom, dad, two older brothers, me) to a family of 8 (spouses) 3 years ago. Yesterday at 9:41 a.m., we went from 8 to 9 as we welcomed my little niece, Charlee Grace, into the world. I am already a little bit obsessed. I can no longer go in a store without going to the baby section. Buying little girl clothes is so.much.fun!!! Before giving my sister-in-law a baby shower a while back, I went ahead and told her that I did not buy them anything they wanted off their registry (sorry!!). I bought stuff that I wanted her to have - which was cute clothes and accessories! I already have presents put up for later. According to my husband, "the girl already has tennis shoes for when she's five, and she can't even walk yet!" This is completely untrue. But his point is not. I am going a little overboard. But she's the first...I can't help it!

Wednesday, June 17, 2015

My Newest Obsession

Since being on my summer break, I have had the time to look up more ways to use my Young Living Essential Oils. I purchased the Premium Starter Kit almost two months ago, and I am so, so, so glad I did. They have already served many purposes in the Brown household. However, my hubby was so not convinced at first. He was all, "since when are you into voodoo?"...........i'm sorry, what?....men. smh

After explaining that I believe God put these oils on Earth for us to use, they're all natural and healthy - straight from the seed, and after him physically seeing and noticing a difference that they have provided, he's been on board!!

Today I experimented with making night face cream and makeup remover cloths. There's so much information out there about how to use the oils...it's a little overwhelming. I literally have 8 tabs up on different ways to make face cream.


My parents willingly decided (were made) to be my guinea pigs with the night cream.
Thanks mom! Thanks dad! :))
They will be applying the cream at night. I did take pictures of their faces so that I can compare their skin after a couple of weeks of using the cream. But I do enjoy living, so I will not be posting them. At least not any time soon. (what mama don't know won't hurt, right?!)

Ya girl is all about simplicity (laziness). Here are some links I referenced that did not use too many ingredients/were not too complicated:
http://lemonpeony.com/diy-all-natural-essential-oil-night-cream-recipe/
http://realfoodenthusiast.com/diy-luxurious-homemade-whipped-body-butter/
http://www.onegoodthingbyjillee.com/2015/04/diy-makeup-remover-pads-for-every-skin-type.html
http://thecoconutmama.com/2015/04/homemade-makeup-remover-pads/

I ended up using the following oils in my cream:


-Lemon (evens skin tone, good for oily skin)
-Lavender (smells great, helps with acne and dark spots)
-Frankincense (helps with acne, reduces appearance of aging skin)
-Purification (helps with acne)

Frankincense is seriously thebomb.com for breakouts. I have used it on acne at night, and the following day, there was ZERO evidence of any acne!!

I'm super excited to see how these products work!! I'll keep y'all posted.